Showing posts with label recipe. Show all posts

Wednesday, 30 January 2013

Store cupboard soup and musings on washing

Oh yes, today is a good day.  There's sun, it's mild enough that I could hang the washing out in just a top without freezing and it's windy enough that it was worth hanging some washing out - hurrah.  There's nothing like pegging out a fresh damp wash to make me feel really happy, silly, I know, but it's got funny little rewards like not costing anything and smelling all gorgeous and fresh.

So, my washing is drying on the line instead of on the heated airer.  The cub is having a nap upstairs - a very odd nap, as he decided he didn't want his normal morning one and seems to have amalgamated it into his afternoon nap by bringing it forward 2 hours.  Oh well, peace and quiet for Mummy and any sleep is better than no sleep at the moment, even if it is at a funny time!

I'm making the most of my time by setting some soup to cook whilst I'm faffing about on the internet working.  It's a super simple soup.  The Cub loves it, the Viking loves it, even I like it and I'm not a huge soup fan.  It's made entirely from store cupboard ingredients and is pretty economical to make.  I invented it when I was first weaning the cub and wanted something quick, tasty, nutritious, filling, cheap and that would stay on the spoon reasonably well as he tried to guide it to his mouth!


Spicy Tomato and Lentil Soup

Baby endorsed!
Ingredients
1 medium onion, roughly chopped
1 or 2 cloves garlic, roughly chopped
1 tin tomatoes (Tesco Everyday type is fine. No need for fancy ones!)
1  smallish cup of dried red split lentils
1/2 pint hot stock (chicken or vegetable)
1 or 2 tsp dried mixed herbs
dried red chilli flakes to taste
freshly ground black pepper to taste

Method
Soften onion and garlic in a couple of tbsp of sunflower oil.  Add the rest of the ingredients and allow to simmer for about 45 minutes, or until the lentils are really soft and pulpy.  I choose to blend it with a hand blender at this point, but the Viking quite likes it as it is and the Cub has expressed no definitive views on the matter.  Once it's blended you can add a bit more water if you want it thinner or simmer for longer to reduce it.  Serve it hot with a good handful of grated cheese on top (and some salt, if you're over the age of 10).


Now I'm going to see if there's time to have lunch and start the bunting for the Cub's room...

Friday, 11 March 2011

Gadget Lust

So I went to John Lewis today to buy four white porcelain bowls with my Xmas vouchers. Terribly dull, but it was getting silly trying to live with just two bowls - I finally made the resolution to go and buy them when I found myself eating cereal out of a saucepan the other day...

Whilst I was in JL they were doing a product demo for this liquidiser thing. I wasn't terribly impressed at first, I like gadgets, but I have a liquidiser so I wasn't that interested. On the other hand they had a display stand piled high with fruit, veg and other goodies and if there's one thing I like: it's free food.

So, I stuck out the sales spiel and then was invited to try some ice cream - ice cream? From a liquidiser? I was dubious.

The ingredients didn;t make me any less so.
Cream. Fine
Honey. Fine
Frozen fruit. Fine
Bananas. Fine
Carrots? Hrmm
Courgette? Wait a sec
Cabbage? Raw? Yes, really.

But wait reader, it was delicious. Fruity and light and sweet and very yummy.

Then they made soup by blitzing up all sorts of ingredients, including garlic and ginger that hadn't been skinned and sticks of celery and lots of coriander and cashew nuts. They whizzed it until it got hot, then served it - raw food, but hot. Utterly delicious.

Plus, seriously easy to wash.

I *waaaaaaaaaaaannnnnnnnnnt* one. All I could think was:
a) good way for me to gets lots of vitamins
b) finally - a way of making pesto and guacamole and other tricky food without spending hours and having it still be lumpy.


Catch? Oh yes, there was a catch. £439 worth.

I'm gonna need a few more vouchers.

Monday, 3 May 2010

The *Goood* Cookies

Over the past few years I have been conducting interested research into cookies. My quest has been to find the ideal recipe for a homemade cookie - something that will produce the delicious crispy round the edges, chewy in the middle American style platter-sized cookie that I've only ever been able to buy.

Well, for a long time this research turned up tasty, yet *wrong* cookies. Finally, about a year ago, I came across a recipe on the BBC food page which, once tested, was promptly saved and renamed as "The *Goood* Cookies". Large, pale gold, lumpy with chocolate chunks, crispy round the edges and chewy soft in the centre they are exactly what I was hoping to create.

The stress earlier this week sent me to my cupboards in my automatic stress-reaction of baking followed by eating and I turned up this recipe again. Perfect. I only had dark chocolate, but i chopped it up and made a batch of acceptable, but slightly solid cookies. Yesterday I tried again. I made sure to measure out the flour exactly (I deliberately used too much last time, a mistake I now realise) and doubled my quantities so I could make two flavours. I cooked them up and have a classic and a new delicious favourite:- milk choc chip cookies and white chocolate and macadamia nut cookies. OMG - yum! Not sure whether my work colleagues will get to share *these* batches, though it'd probably be better for my waistline if they do. Perhaps I'll make some small ones ;-)

The recipe below is written from memory and includes my own little adjustments. Apologies for the changes between imperial and metric measurement - that's just how they stick in my mind!

Ingredients
3 1/2 oz granulated sugar
2 1/2 oz soft light brown sugar
125g unsalted butter
150g plain flour
150g goodies to add in (chocolate, nuts, raisins, a mixture thereof - whatever you fancy, but I recommend the white choc and macadamia nut mixture. Dried cranberries are nice too...)
1 egg
1 tsp baking powder
pinch of salt

Preheat oven to Gas mark 4/180 degrees. Melt the butter slowly in a small, heavy pan. When melted pour into the sugars and beat well. Add in the egg and then the dry ingredients. When you have a nice homogenous cookie dough mix in your goodies and leave the bowl in a cool place until it firms up a little - do not add more flour like I did, it's not a good idea.

Place heaped tea spoonfuls of the mixture far apart on a sheet on baking parchment on a baking sheet. Put in the oven and cook for between 8 and 15 minutes depending on a number of things like the size of your cookies and the efficacy of your oven. My oven is so poor it takes about 20 minutes to cook them, but my mum's amazing Neff oven cooks them in 8 - so be aware!

When they're done the cookies will be about 3 times the diameter that they were, very flat, golden brown round the edges and with a shiny crackled glaze across the surface. Remove from oven, leave to cool a little, then transfer to a wire rack to finish cooling. Whilst they're very hot they'll be all floppy so don't try to take them off the tray immediately.

Eat with a tall glass of cold milk and revel in the American-ness ;-)

Cooked cookies will keep in an airtight tin for a few days (though not in my house, cos they get eaten within a day). Or you can divide them into balls and freeze them, wrapped in baking paper and foil (or in a long sausage affair which you chop slices off) then you can drop a few on a tray and whack them in a hot oven - hey presto! Instant fresh homemade cookies. How to fool people into thinking you're a Domestic Goddess!

Tuesday, 5 January 2010

Improvising

So in these days of dreary chill there is one small upside, for me at least - I'm able to increase my storage space. Ok, I know that sounds weird, but wait and see...

At the front of the house we have what I call an 'airlock' - a small enclosed porch, so you have to pass through two front doors to gain access to the house. Not only does this provide added security and offer a very helpful access point when you have two small kittens you're trying to keep inside the house, but it also doubles up as a greenhouse and larder/'fridge. You see, as I said yesterday I had to bring all my pots in from the garden and I haven't that many places to keep them. The airlock provides an ideal spot, because it is bright and not as cold as it is outside, since it is brick and double-glazing.

Despite the brick and double glazing, it is un-heated, which means that it is far chillier in the airlock than in my lovely warm front hall (also helps keep the cold out of the house when you're going in or out). Therefore the temperatures in there are very much in line with what you might expect to find in a refridgerator, which is why, when you come in through the first front door, you are confronted not only with hubby's smelly running trainers (better there than inside the house, believe me!) but also with two large potted plants, a container of chilli con carne, a 4 pint bottle of milk, a large bag of carrots and a block of cheddar cheese. It's also a very handy place for cooling things down before refridgerating them - much like an old fashioned larder - without just sticking them in the 'fridge, which costs money as the 'fridge struggles to cool itself down again.

I have also, just this minute, stuck my large Le Creuset casserole onto a cork mat outside the back door. I've been boiling up a chicken carcass for stock and soup and, since I want to make soup out of it later, needed to cool it down quickly. What better place than outside in the settling snow?! Brilliant!

When I grow up I want a house with a real larder so I have these options in the summer, too!

Wednesday, 30 September 2009

Syrup, Jelly and a whole bunch of needles

So today was a busy day. I would tell it chronologically, but just because it's *chrono*logical, doesn't make it logical to tell, because I did a bit, did something else, went back to the first thing etc. This sounds disorganised, but it was the most logical order to actually *do* it, because I had to wait for things to get ready or get hold of stuff, so I'll miss out the bit where I went to the supermarket to buy the sugar for my preserves and tried to get hold of some glass bottles. So...

Elderberry Syrup

-A whole load of elderberries
-Some water
-Granulated Sugar
-Cloves
-Rind and juice of 1 lemon

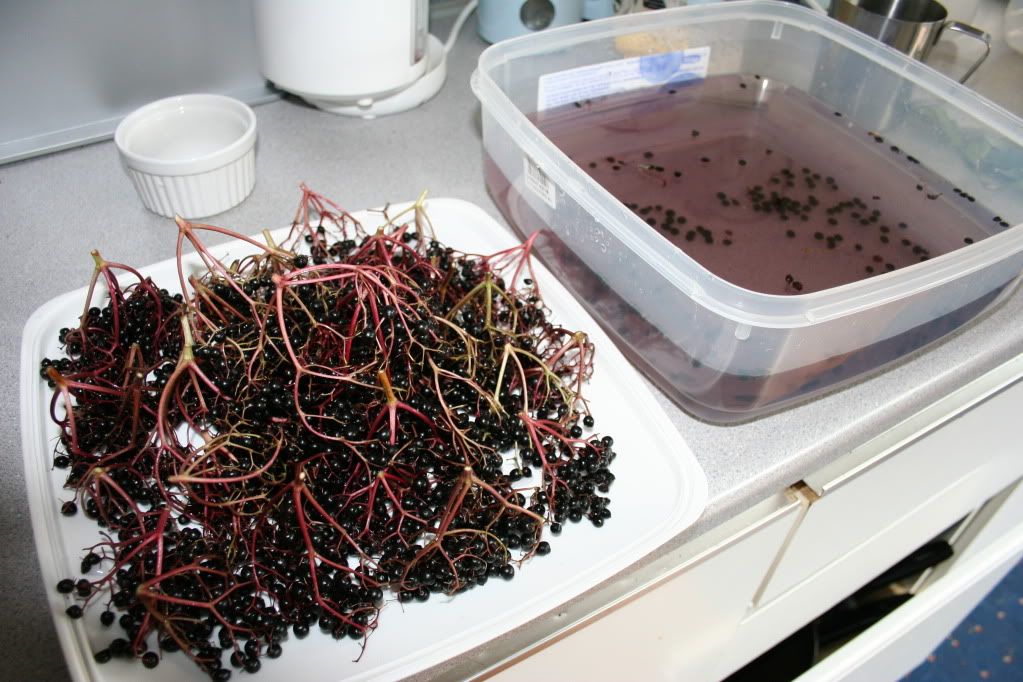
First I dunked the elderberries in a deep pot of water. Any bugs and stuff rinsed off, then I picked over the berries discarding any old ones, but especially getting rid of any green or red tinged ones. If they're unripe then they contain cyanide and are totally poisonous. They need to be deep, dark purple - almost black.


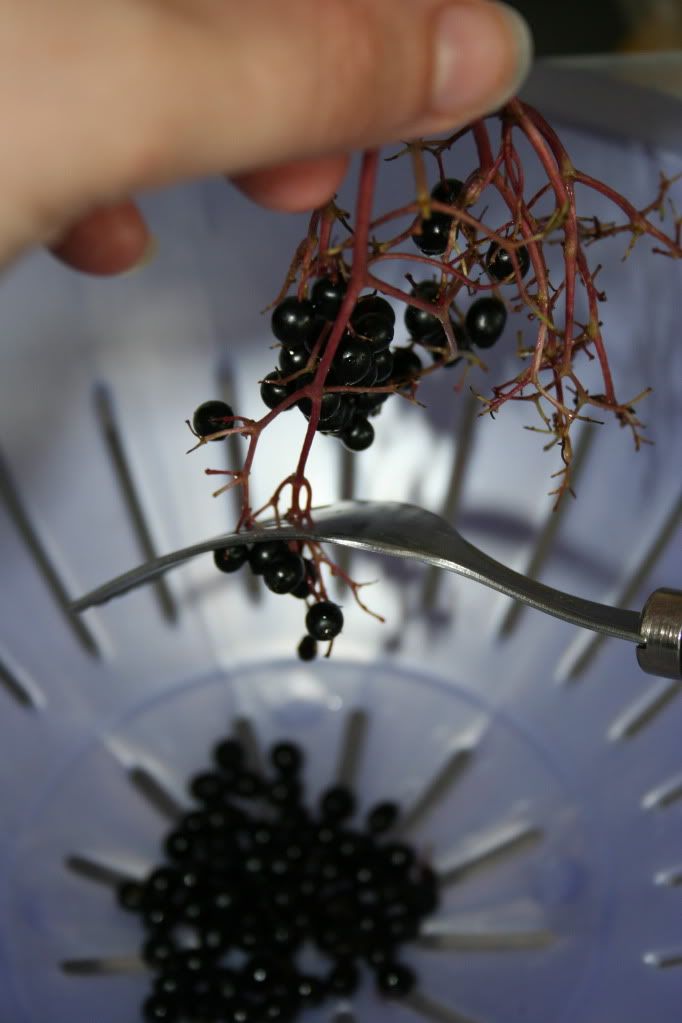
Once this was done I used the tines of a dinner fork like a comb to remove the berries from the stems - excellent tip I found on a website somewhere. Made the whole thing very speedy.
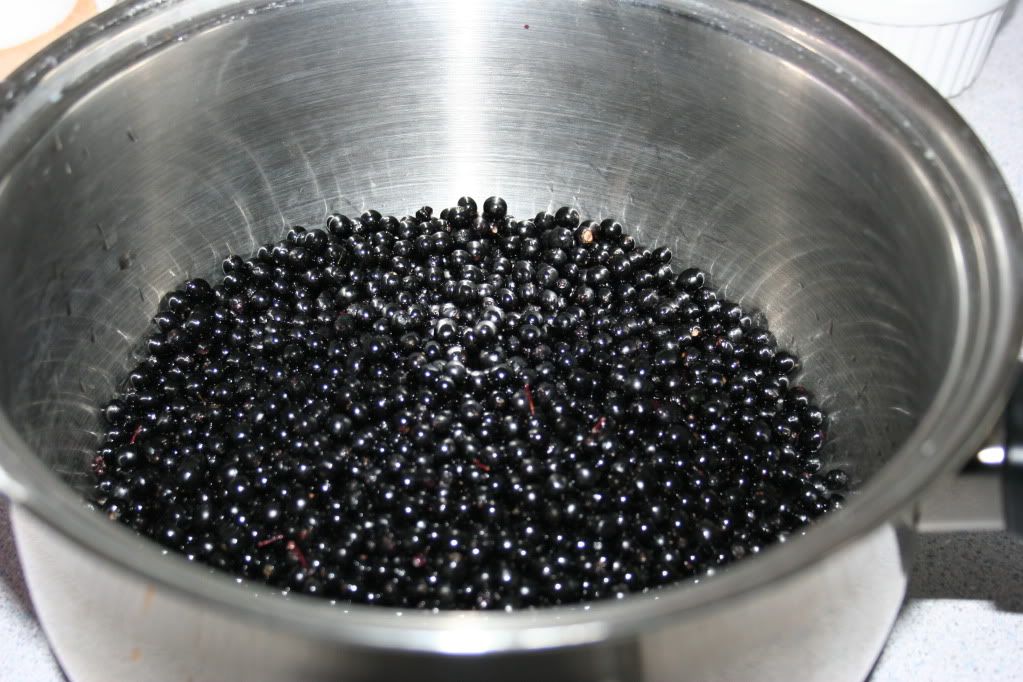
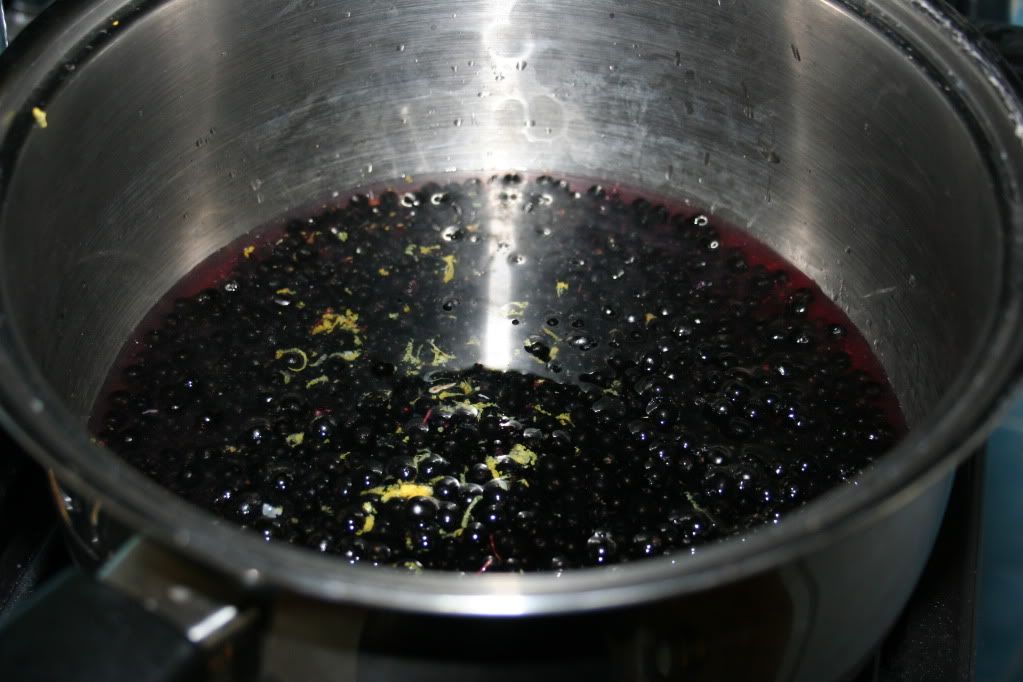
I dumped the berries in a saucepan with enough water to cover them and the juice and rind of the lemon. Start boiling.

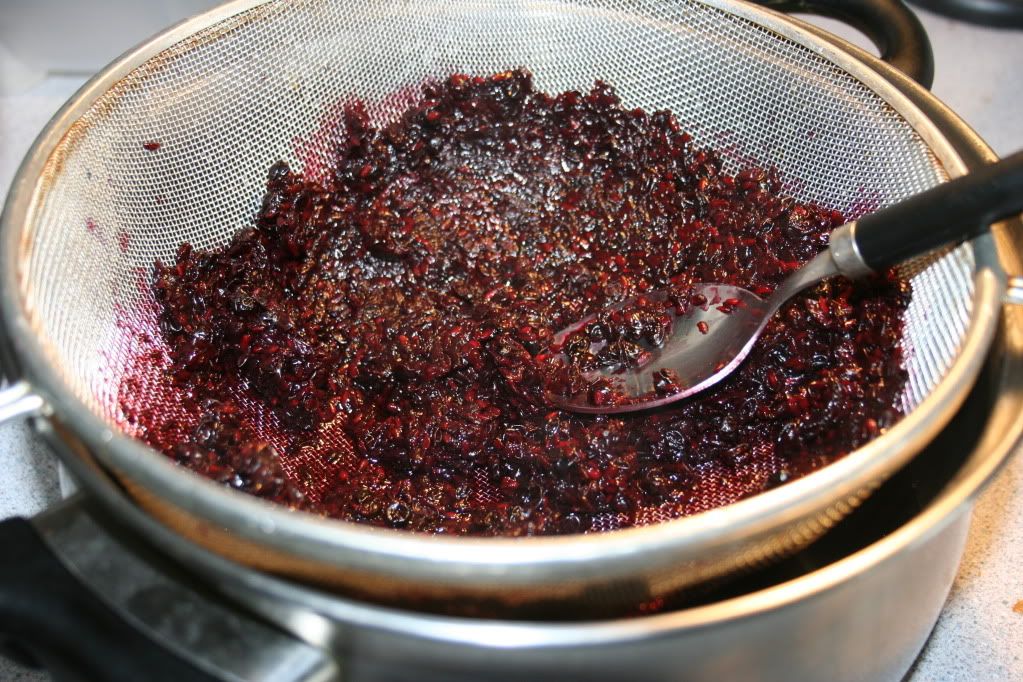
When the berries were nice and soft I mashed them up with a potato masher and put them through a sieve, using the back of a spoon to squish the juice out.

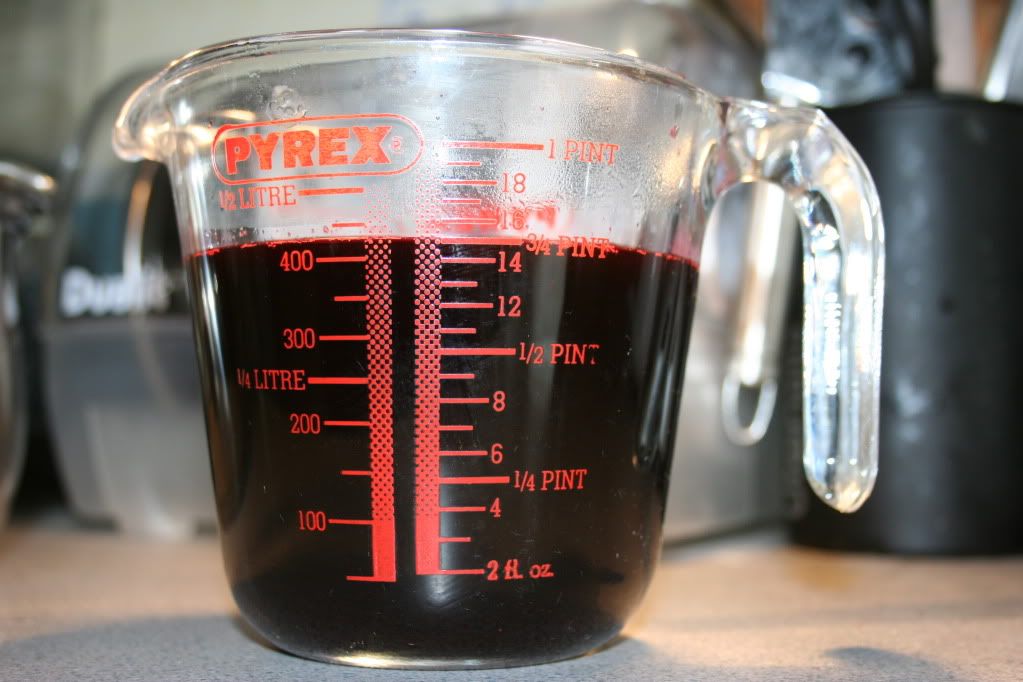
I poured the juice into a measuring jug to see how much sugar to add. It's a lb of sugar per pint of juice, so for 3/4 pt I needed to add 12oz sugar.

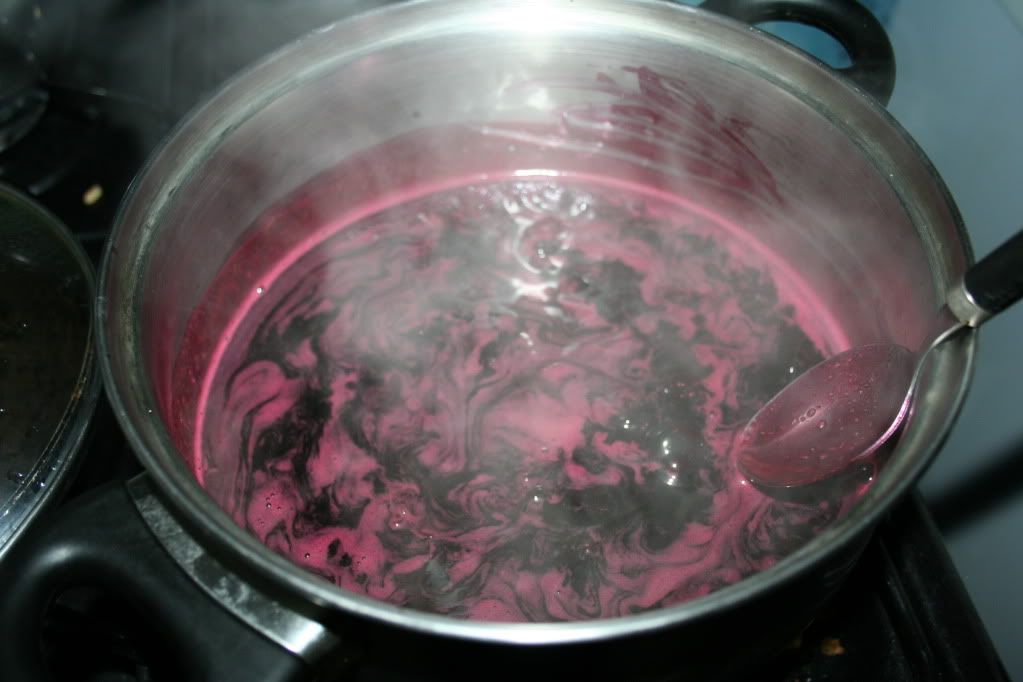
I put the juice and sugar into a saucepan, added the cloves (10 per pint, so I put in 7) and boiled up until the sugar had dissolved, then boiled a bit longer till the liquid had thickened a bit and coated the back of the spoon when I lifted it out. I poured the syrup into small sterilised glass bottles using a funnel (sorry, no pictures - bit too tricky as I needed an extra hand just to do the pouring, never mind take a pic!)
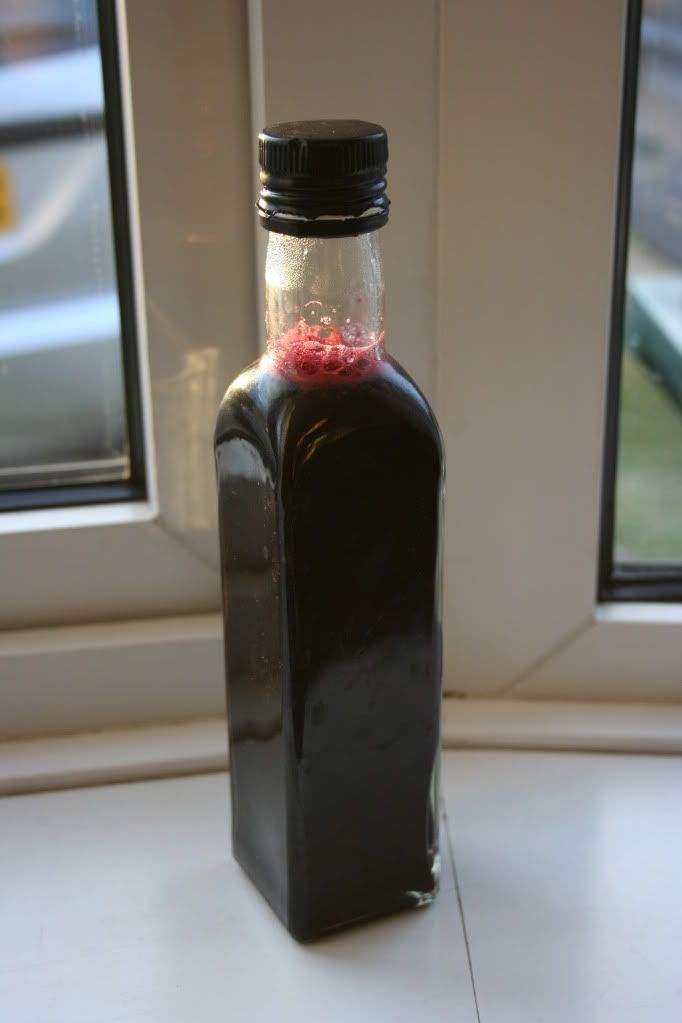
I screwed on the lids and left the bottles to cool. Here's my first ever bottle of syrup! Apparently a Tbsp in a mug of hot water is the way to drink it. I apologise to hubby who got given a drink of rather more powerful proportions than this!
Crab Apple Jelly

-4lbs crab apples
-2 pts water
-juice of 1 lemon
-Granulated sugar
-4 cloves

Cut away any bruised bits of the crab apples, chop into quarters and put in a pan with the water, cloves and lemon juice. Cover and boil up at a low simmer until the crab apples are soft and pulpy. Strain into a clean bowl overnight (see two posts previous to witness my clever straining contraption). Do not squeeze or it'll get cloudy and gross looking.

If you need to you can chill the juice at this point for a day or two, or you can freeze it until you're ready for it. Be warned - the juice is very very bitter and sour at this point, so don't taste it - just enjoy the delicious appley aroma! Don't worry if the juice looks cloudy, it clears up when you heat it.

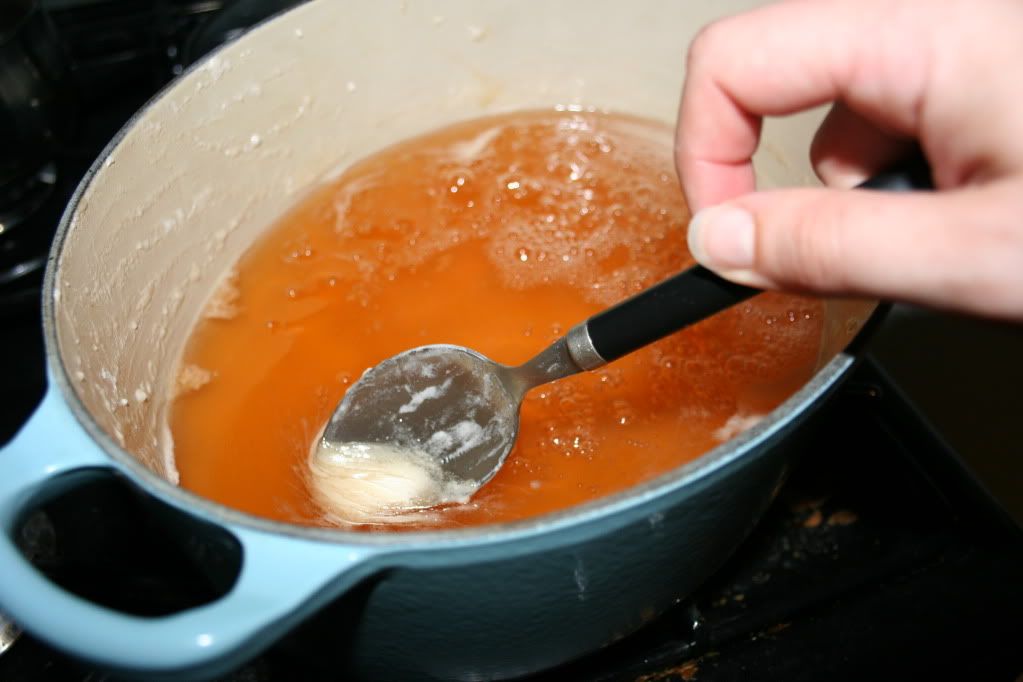
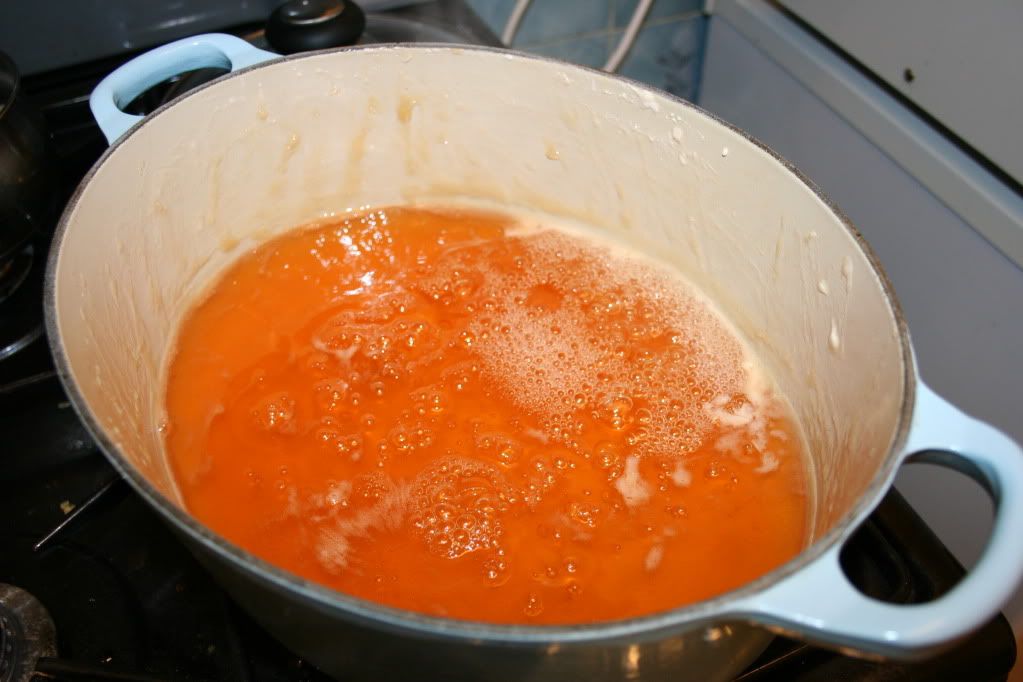
Now to the jellifying! Add in the sugar -- same again, 1lb sugar for every pint of juice. For the 1 1/2 pts I got, I added 1 1/2lb sugar. Let the sugar dissolve on a low heat, then bring up to a good rolling boil. The important thing is to skim the scum off the top thoroughly as you go. Unlike with soup this is quite easy, because the scum holds together. According to Katie Stewart one must be thorough to ensure a clear, sparkling jelly!

Here's how much scum I got off before it really got boiling.Hold it at a rolling boil (use a decent heavy-bottomed pan to stop it burning. I used my enamel Le Creuset casserole in the absence of a 'proper' jam pan) for 10 to 15 minutes, then start testing for a set on a cold plate. When a skin forms and wrinkles you're ready to put the jelly in pots.
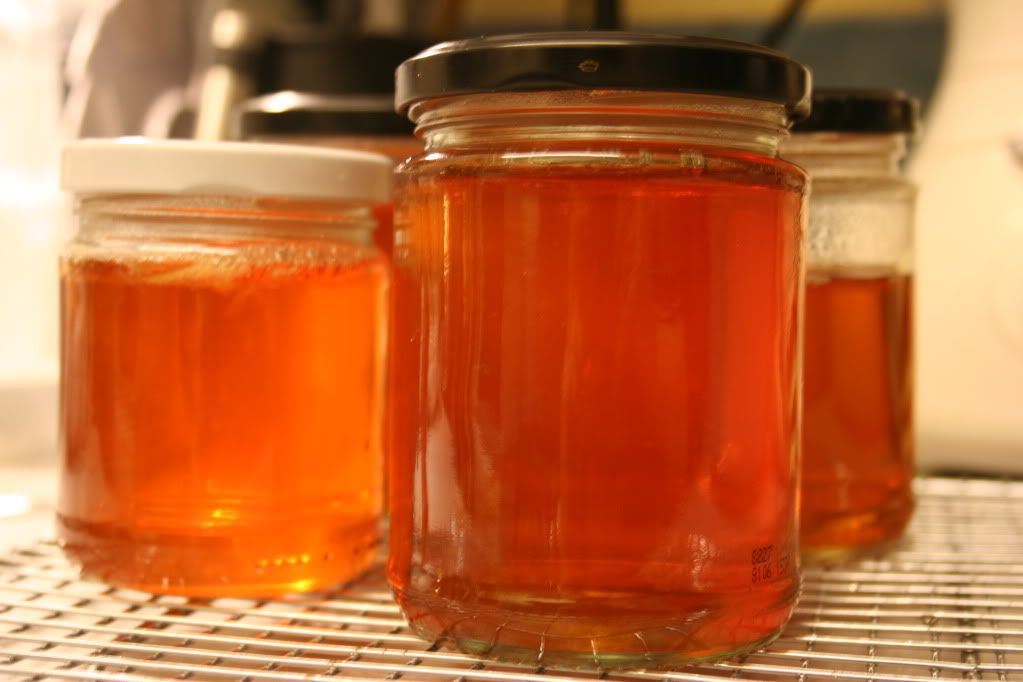
Make sure the pots are clean and warmed from the oven, boil the lids and dry them, then ladle the jelly liquid into a clean jug and pour into the pots. Unfortunately, because I didn't get as much juice as I had thought or hoped I would, I only got 3 and 3/4 small jars out of this batch, but boy am I proud of them! Mulled cranberry jelly next time I think, or apple and rosehip? Depends how many rosehips I gather. Anyway - admire the sparkling amber colour of my jellies...!
It tastes damn good too. Hubby and I had scum on toast as a snack! Tart and sweet and very appley. Yum.

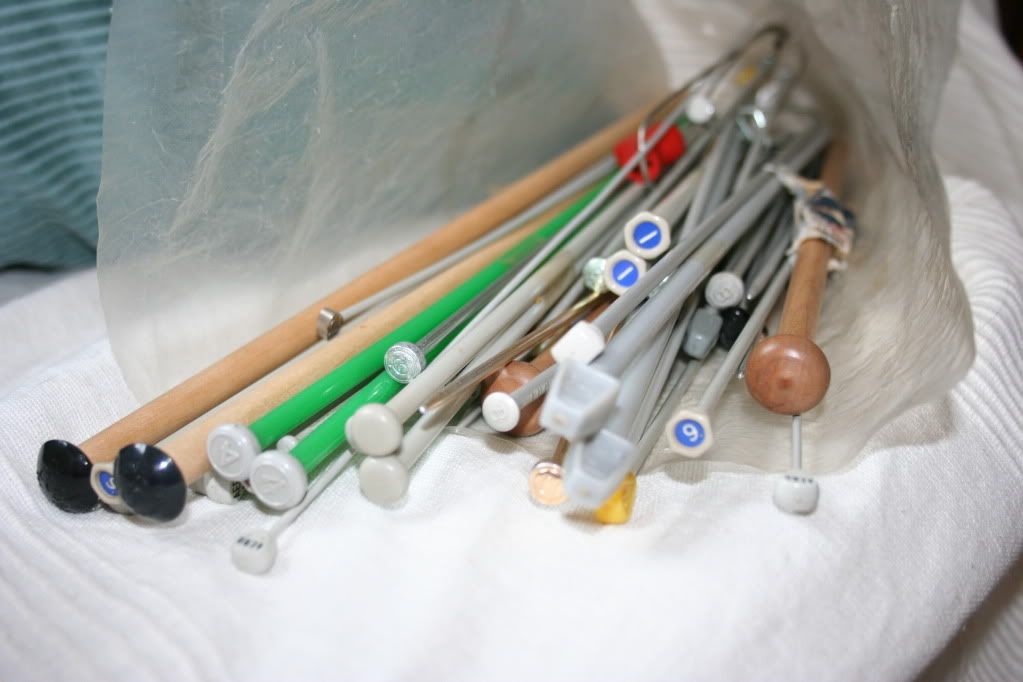
I also went for a lovely walk earlier and, taking the advice of the very good friend who originally directed me to the Down To Earth blog which set me back on this path, I had a look in a charity shop for some knitting needles. I asked the nice old lady behind the counter and she got down this enormous bundle of needles and stitch markers from a shelf in the back.
"That'lll be a pound, chick."
"Deal!"
"It's just not worth our time sorting through them all, so we sell them as they come to us."

So yes - I got this collection for one little pound - probably some old lady who died :-( Still, at least her needles will be put to use... only one problem - they're all in 'old money' as it were - needle sizes instead of mm measurements. Oh well, I'm sure I'll figure it out!

A successful day I'm sure you'll agree. Oh, and check this mega 5kg bag of sugar I bought!
It cost me £4.30 ish I think... I suppose I ought to work out how much each jar of jelly cost me to make... The jars and crab apples were free, ditto the water ;-) well, free-ish. Cloves were negligible and the lemon cost 65p for 4, so about 16p? So 4p per jar for the lemon and if anyone wants to do the maths for the sugar and let me know...

OK, OK. 24oz = .68kg.

If 5000g of sugar cost 430pence then 100g = 8.6p then
680g = 59p

and for almost 4 pots that's 59 divided by 4 = 15p

So 19p per pot? Hurrah! 1 nil for cheap homemade vs. commercial!

Saturday, 26 September 2009

Tonight's Dinner

Easy Peasy Spicy BBQ Chicken Pizza with Green Peppers

1x ready made frozen cheese and tomato pizza (mine was homemade, but that recipe another time)
3 Tbsp Spicy BBQ sauce
1x handful cold cooked chicken
1/2 green bell pepper
1/2 onion

---------
Stick it all on the pizza and cook as normal ;-)

To make the BBQ Sauce
4 Tbsp tomato Ketchup
3 drops hot pepper sauce
1 tsp sweet chilli sauce
1/2 Tbsp Soy Sauce
2 Tbsp Soft brown sugar (light or dark)

Stir together, taste and alter to your taste. If you don't want it hot at all then leave out both the hot sauces, if you just want it a little spicy leave out the hot pepper sauce. If you're gonna use it as a marinade for grilling, BBQ-ing or oven baking then you'll need to add 2 or 3 Tbsp of a light cooking oil, too (eg - sunflower oil).

Delicious!